Showing posts with label process. Show all posts

Tuesday, September 1, 2015

Bits and pieces...

Collapsible thread catcher with laminated bicycle fabric
So - since my last post I've managed to get a few things a step closer to completion. Practically speaking "completion" is the end game I guess - but  getting there is really what it's all about. The journey so to speak. (this is my cleaver way of justifying never getting anything done!) Making progress on an "in process" is always a bonus however. I'm almost afraid to tally up my "in process" projects for fear they will send me into panic attack mode. But "just for fun"...

Quilt a long at Miss Rosie's last week - in which we stitch , drink tea and eat cookies!
  • Gypsy Wife Quilt  - all blocks done - just requires the sections put together.
  • Christmas Stars Quilt - not sure what's happening with this quilt - I usually pull it out every Christmas and work on it during a Harry Potter or Hobbit Marathon - ahhh tradition! 
  • Hometown Picnic Quilt - Oh - SO - CLOSE!
  • My Small World Wallhanging (Started cutting all the little squares - but suddenly got distracted by the next quilt on the list)
  • Circle Game Quilt - offered as a class at my LQS - only 2/16 blocks done so far - me bad!
  • Autumn Quilt as You Go Table Runner - loved making this with a gay improv abandon - but when I hit the "sashing instructions" I went blank. (Note to self: You must learn how to do sashing. Going blank is not an acceptable oft repeated excuse).
  • Christmas Gold Table Runner - no excuses here - I want this done by Christmas.
  • Matryoshka Lemoyne Stars Lap Quilt - I loved making the stars - but my colour palette is a bit challenging - I think it would make a nice child's quilt.
  • Improv Log Cabin Bedrock Quilt - I started this as way to try my hand at improv block making - lots of bright primary coloured blocks with dinosaurs in the middle - another child's quilt?
  • Craftsy 2013 BOM Quilt - I learned alot of great techniques making these blocks. I didn't get all the blocks done - but there's enough there to move this towards a completed project.
  • Chatter of Houses Quilt - Yoko Saito Quilt . This is being hand stitched and is a labour of love quilt so I don't mind having it in the "in process stage".
  • Green Stitch Hexagon Quilt - this was my first attempt at hexagons (part of a "piece and love hexathon group" on Flickr - dated 2012.)
  • Epic Passacaglia Quilt - This is another hand stitching project. I did get started but bogged down with all the fussy cutting. Plus I spent so much time on Instagram admiring other people's #passacagliaquilt progress I made little forward movement on my own. (warning: do not go down that rabbit hole!) Things have come to an abrupt halt and the endgame for this remains uncertain (a mini not so epic mug rug perhaps?). 
  • Christmas Bells Applique Wallhanging - just needs the backing / quilting and binding.
  • Viking Socks Applique knitting bag - I started this to put my next project in...
  • Viking Socks stranded knitting project - because I like to knit and wear hand knit socks.
  • Audrey cardigan - this sweater is all done except for 4 rows on the last sleeve - now how pathetic is that! I had to quit when the temp hit plus thirty degrees Celsius and I just couldn't pick it up!
  • Tour de Fleece handspun - this is my handspun fibre project for this year's 2015 Tour de Fleece group. I need to skein one bobbin and ply the remaining two bobbins.

I have the fabric and patterns for a few bags etc but since I haven't officially "cut into anything yet"  I still have options. Soooo... here's the tally:
  • 9 quilts (the #passacaglia quilt status is not yet confirmed)
  • 2 table runners
  • 2 Wallhangings
  • 1 project bag (sewing)
  • 2 knitting projects
  • 1 handspun project
17 projects in all - anyone having a panic attack yet?

Having done a mental inventory and documented it I have surmised that things aren't as bad as I had thought. I like the projects I'm working on and it's good to reflect where I am on the "completion spectrum. It helps with prioritizing what I want to work on next.

Happy stitching!


Wednesday, February 12, 2014

To Russia with Love!

So for all you Sochi Fans this is a quick post for a few of my current "in process" projects. I belong to Team Canada - a knitting group on the Ravelry site which is competing in the once upon a time Ravelympics group (now called the Ravellenics after receiving a cease and desist order from the IOC - strange but true).

I am a big fan of the Winter Olympics. So much so, that I take a winter vacation during the Olympics, and immerse myself in all things related to the big event. This year to accommodate the time change I am PVR'ing events all night long and watching them all day long (no spoiler alerts!).

This is a picture of my Sochi interpretation of Peace Gloves by Nanette Blanchard for the nordic colourwork combined / mitten moguls event. At this point I am well into the gusset of the left thumb...

Sochi Peace Glove - front and back
I've also hauled out my sewing machine into the living room during the day so I can quilt and watch on the big screen. I had some matryoshka doll fabric in my stash - so I'm also working on a Lemoyne Star Sochi Scrappy Stars quilt...


Granted - I'm pretty sure I won't get the quilt done anytime soon - but I'm loving the fabrics and the process.

Get quilty and knit on!

- stitchcat -

Linked to WIP Wednesday on the Needle and Thread Network

Saturday, May 11, 2013

Just a little something ...

I was at the store this morning buying groceries and "buy M.D. card" was on the list. As I perused the scattered remains in the card section (which is what happens when you leave it waaaaaay  too late) I was reminded of a segment I'd just heard on the radio asking women what their best and worst Mother's Day gifts were...

The worst? A ride on lawn mower (yes - you have read that correctly).
The best? The homemade/handmade gifts. Now I've made and  received my fair share of sea shell macaroni vases  and Popsicle stick jewelery boxes in the life. I can confirm that yes, any gift I ever got that was made with love was always the best.

And so - Mom this one's for you. Happy Mom Day to the woman who made all my clothes when I was young, taught me the value of a good pair of scissors, and never, ever pass up an opportunity to just make it!


I found this free pincushion pattern over here on paper.string.cloth. I upped the square size to 3" and lined the cushion with muslin. I like to fill my pincushions with crushed walnuts to give them a nice weight as well.

Friday, May 10, 2013

April showers bring .... a belated post?

(I started this post back in April - hence the title).

So. I am up to my eyeballs in projects right now. (Have I written about this before?) I have picked up yet another couple of projects along my way (yes indee-dee it's true) and I find I've had to buy more project boxes to stash them all in an orderly fashion. (I'm now resorting to baggies).


I joined the "Pretty in Patchwork - Holidays Sew Along" on Threadbias a while ago just to follow along (ya right) and the next thing I knew I had bought the book and was scrambling to get the March project done. I started on the 29th. No pressure there. This was to be a "not one red penny" project - aka "stash buster" and aside from the fusible backing that I required- I managed to hold firm.

The March Sew Along was the "Harvest Vine Table Runner".  I wasn't really feeling the love for an autumn theme (it was March after all) but someone else posted a bright happy version... and needless to say I was off to my stash.

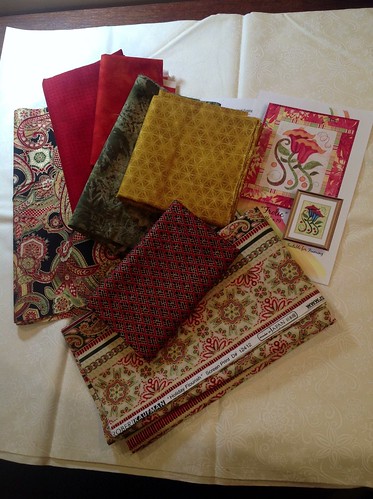
I am a sucker for bright fabrics. I also love the flowery stuff. I seem to purchase it by the metric ton - and then it sits forever while I try to figure out what the heck to do with it. (I do paw it alot however).

So here (left) is my final selection using 6 Kaffe Fassett fabrics from a fat quarter bundle I purchased around Christmas.


I spent a goodly amount of time learning how to piece curves. Turns out it's really pretty easy once you have a handy little video tutorial to show you how!


It took a leap of faith to just "let it happen" because it just looked too easy to be true. But it worked  like a charm and before I knew it all 24 curved petal bits were done.

I also wanted to try my hand at designing a "Creative Quilt Back". I'd taken a free Craftsy tutorial (of the same name) and using scraps from my quilt top this is what I ultimately came up with.


Next came the quilting! This is something I really love - the free motion bits. I'm not very disciplined at staying with a plan - so this little project was perfect for exploring techniques, threads etc. I used a transparent Mylar thread on top for two reasons: 1. I had a lot of colour and activity taking place on the top already and  2. if I screwed up I didn't want to see it.  A basic off-white machine quilting thread was used in the bobbin. This worked out well because I could see my quilting stitches on the backside. It was a good way to see where things went well and other areas... meh!


And finally a finished project!


Enjoy every making moment of your day!

Saturday, March 2, 2013

Happy March 2nd! (aka) Happy Saturday!


This is just a quicky post to let you know where I am on the stitch-ey side of life. Lots of new projects on the horizon - now that I'm actually viewing some of the online classes I signed up for during the "great 50% off classes" event over at Craftsy on Black Friday.

Having spent all that moo-la, it is only natural that I would be working on the one "free class" I had in my basket - the 2013 Craftsy BOM. I have a FQ bundle called "Wordplay" (by Benartex) that's been sitting  (languishing?) in my stash for a while now, and this looked like a good option for it. Of course once I got started I realised I hadn't enough suitable background fabric so off I went to the shop. I also discovered they have more of the WordPlay fabric if I get desperate (Except for the 1 FQ I really want).


But I digress...

I put my blade to fabric and got cutting a few weekends ago as I was already 1 month behind. January's block is called "Offset Log Cabin". Offset in that the widths of the strips vary. I've never done log cabin as I was afraid to just "try it". It's a great block for fearful first timers... and it's nice to see how flipping the blocks can create different looks over all. (See below).


I fussy cut the centre square - but I'm not sure it was worth the effort. Would likely have been more noticeable if the object was a little birdie or something.


The February block is called "Spring Blooms" I suppose it looks like a flower. The skill being taught for this block was "partial seams." I really enjoyed this block - and I finally took the time to figure out exactly where the "scant 1/4 inch" sweet spot is on my sewing machine (I have "saved" this into the machines memory bank as well).

I practised my strip piecing and cutting techniques...


... and ended up with a block that fit together perfectly!


Last but not least my reverse side pressing fit together like a perfect puzzle! I am delighted!


I peeked ahead to see what my March block assignment was - but was told "No peeking!"... will need to get back there soon!

Sunday, January 20, 2013

Finished!


First things first... Happy New Year! I had a great couple of weeks in hibernation. Santa was wonderful (as usual) and I am now the happy owner of a lightpad! This is the newest version of a light box. I began coveting one after my first fusible applique class - and could see the advantages of not having to tape everything up on the window for doing transfers. But I'll talk about that later (in a future post).

Now for the matter at hand. (See pic above). I've had the Abbey Bag pincushion & scrapcatcher pattern for a couple of years now. I was feeling a little overwhelmed by the number of incomplete stalled  in process projects I have going at the moment, so I needed something quick and easy that "smelled of success". I also needed a pin cushion. I had seen this particular pattern done up in the "Housework Whenever" fabric line - and being as that pretty much is my credo for life (think grave marker material) I finally found it online in an Etsy store. (I had to purchase a whole quilt kits worth however - so I anticipate I may actually go to my grave swaddled in the stuff).

I have to say I really enjoyed making this pin cushion. It has a little inside pocket to hold anything from your TV remote (I confess I do watch telly while sewing something repetitious) or my glasses. I'd never heard of using crushed walnuts for stuffing but was willing to give it a go - and I am converted! I liked it much better than rice. I found it at Petsmart and I probabely have enough to make pincushions for everything person in my neighbourhood. I initially overstuffed the cushion the first time round and had to dump it out and start over.


The pattern also called for "fabric glue" - again something that I've never used before. But I ventured on. I decided to alter the pattern using a velcro patch to attach the scrap catch to the pincushion because I haven't really found the best place yet to put them both together  - *being left handed I like to keep my pins etc to my left*- so most of my notion etc are all there.

(* I have just had a eureka! moment and gone to Google images to ask "how to pin a seam allowance" it looks like lots of people pin with the pin head going to the right. I do the opposite. Hmmmm - I've never seen that before. I was taught to sew by my mom who is also left handed - is that why? I will try this to see if I can actually pull out pins and pop them into my pincushion with it on the right side - if this works then the scrapcatcher has a perfect home!)


Okay - back to the better at hand - here is my pretty pincushion all done! I will make a few more in the future to give as gifts...the Abbey Bag is delightful! So based on my personal taste of fabrics selected and my abilities I give this project a big 4/5 thimbles up!


Wednesday, December 5, 2012

Christmas in Bloom

So just as the snow began to fly I decided to take a "my first fusible applique" class. I had waitied til the last minute to register - because I wanted to make sure the weather would be okay - as this class was out of town. The forecast looked good - and of course - it was wrong. It got cold. And foggy. And loads of snow started to fly.

The upside is that the Rumpledquiltskins shop is a classic heritage building and when winter comes it is decorated with lights, and festive tins, and boxes. Seasonal quilts and boughs and tiny lit Christmas cottages abound. Add to that - festive fabrics, threads, patterns, books and ohhhh! The wall of quilty gifts of goodness!

But back to the class... the store has a "class runs no matter what" policy so even though there was only 2 of us - we got the full benfit of the instructor. Almost like 1:1 which is great because I can be  v e r y  s l o w on the uptake (especially after a full day of work).


Having said that - the pattern I chose for my first fusible project is called "Frolic". It's part of a group of patterns by Jane Spolar of Quilt Poetry. Because I wanted to be working on something that was in keeping with the winter festive season I decided to choose some lovely fabrics (some from my stash) that had some metallics and Christmas ornamental themes.


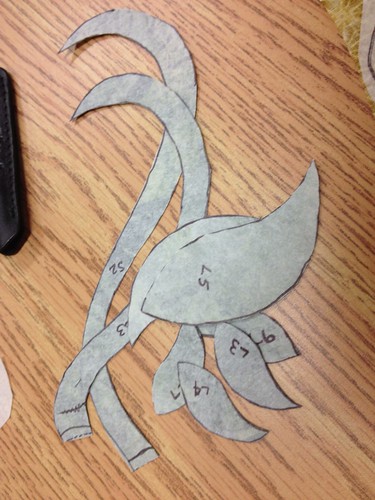
Using a lightbox (add to wishlist) I traced the reverse image of the pattern onto some Wonder-Under fusible web (need more of that). I then cut out the pattern pieces and ironed them on to the wrong side of the various fabrics. I then cut out the pieces on the marker lines.


Saturday, December 31, 2011

Jumbo Christmas stockings...


So this year my goal was to "... get those stockings done!" I'd bought the pattern, fabrics, batting and threads last year - and of course I didn't quite get there. Although the boys are now 22 and 24 (as in years - not months)  I really needed to complete this so it wasn't technically a "quarter of a century" in the making. (They have had a Christmas stocking of sorts - but I always envisioned the handmade family heirloom that so many people talk about).


The pattern I bought (Simplicity 4842) was not a quilting pattern and I wanted to quilt something on the stockings; so I chose the heels, toes and cuffs. This of course required a few modifications (it always does) such as additional backing to the toes and heels, as well as some extra batting.


I am new to the whole "free motion" quilting concept, so my technique really isn't very good - but I forged ahead anyways.


As I worked away, it became readily apparent to me that the "medium size" stocking was immense. I'm of the mind set that stockings are hung and Santa traditionally puts in a box of pencil crayons, a magazine, a few little stocking stuffers (remember Mattel Hot Wheels?) and a bag of Christmas candies (which in our house has evolved into Holiday Skittles and the annual Christmas Terry's "Whack & Unwrap" Chocolate Orange). As I worked I could see that these stockings could easily replace any need for a tree at all.


Having said that, stocking number 1 was wonderful. Or so I thought. (Click here) Needless to say - stocking #2 is on hold